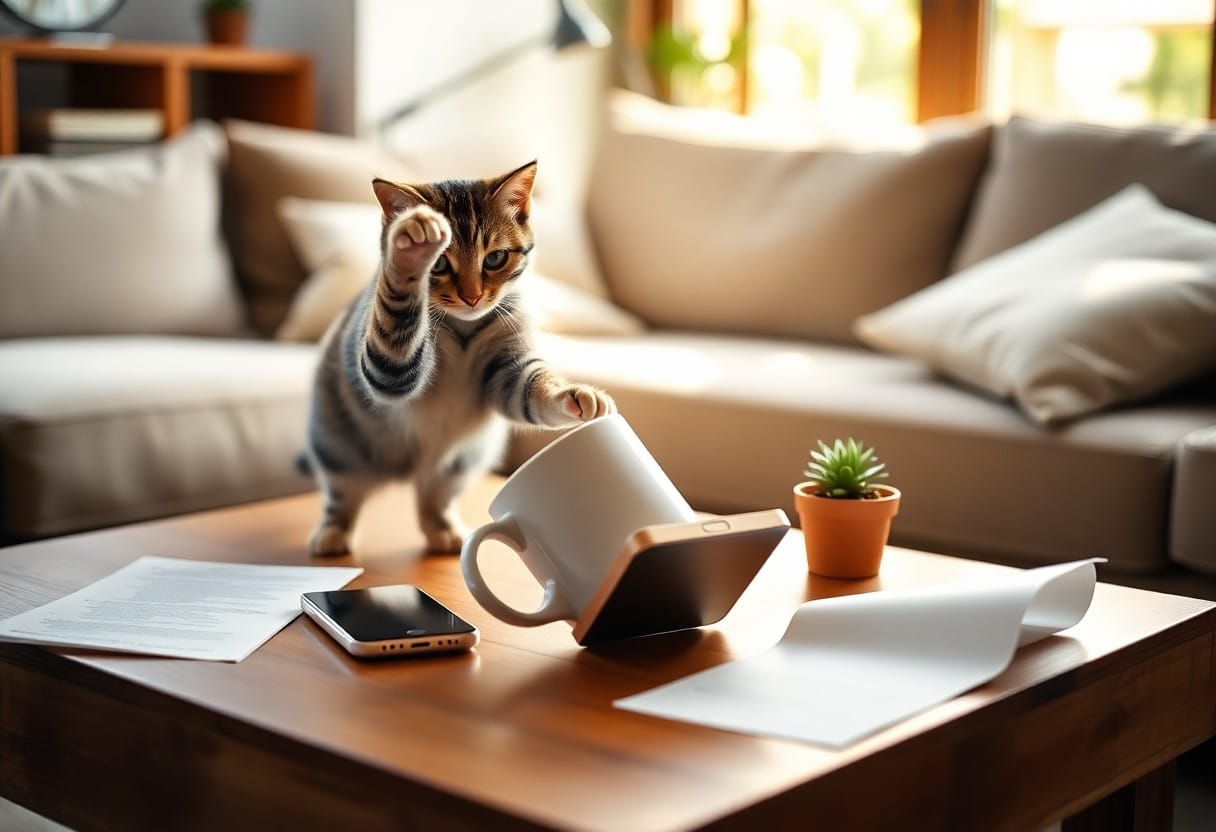
We’ve seen a massive spike in “do it yourself catnip toy with toilet paper roll” videos on TikTok lately, and while they look fun, some of them are accidents waiting to happen. You don’t want to spend five minutes making a toy only to spend five hours at the emergency vet. Before you start stuffing that sock or rolling that cardboard, you need to know exactly what can turn a fun kicker into a choking hazard. Supervision is mandatory whenever you introduce something new to your cat’s environment.
What Fabrics Are Safe for Cats?
Stick to tightly woven, natural materials like cotton, denim, or wool felt because they don’t unravel easily under heavy bunny-kicking. Polyester fleece is also a solid choice for “no sew catnip pouch instructions” since it doesn’t fray when cut – seriously, it’s a lifesaver for non-sewers. Avoid cheap synthetic blends that shed micro-plastics or thin linens that claws can shred instantly. If you can see light through the weave, it’s too flimsy for a kicker.
The Scoop on Fillers: Choosing Wisely
Most people just grab standard polyester fiberfill, which is fine, but make sure it’s labeled non-toxic and hypo-allergenic. If you want to make catnip toys at home that are eco-friendly, you can actually use scrap fabric or old t-shirts cut into strips as stuffing. Never use Styrofoam beads or those silica gel packets – obviously – but also steer clear of cotton balls which can be easily swallowed if the toy rips open. Digestibility is the biggest concern here.
A lot of us love adding that satisfying crunch to a kicker, and while recycled plastic seems like a great hack, you have to be careful which kind you use. Clean, crinkly candy wrappers or cereal box liners are popular, but never use plastic grocery bags with ink that can flake off or degrade into toxic bits when chewed. If you’re using a toilet paper roll as a core structure, ensure all the glue residue is gone first. And if you’re adding dried beans or rice for a rattle effect, seal them in a separate, secure inner pouch first so they don’t spill out and become a choking risk if your cat hulks out on the toy.
The Deal with Strings and Other Accessories
Feathers and ribbons make a toy exciting, but they are also the leading cause of linear foreign body obstructions in cats. If you’re following “diy catnip toys” tutorials that suggest gluing googly eyes or sequins on, just skip it. It’s not worth the risk. Any string or yarn used to tie off a no-sew project must be knotted tightly and trimmed short. Loose loops are just asking to get wrapped around a tongue or a paw.
Bells are another tricky subject because while the jingle is cute, cheap craft store bells often have slots wide enough to catch a claw – or worse, they crush easily, releasing the sharp metal clapper inside. If you absolutely must have sound, sew the bell deep inside the stuffing where your cat can’t get to it directly. And regarding yarn – wool is safer than synthetic nylon string because it breaks easier if caught, but ingesting any length of string can saw through intestines. So if you see your cat gnawing specifically on the ties or decorations rather than kicking the body of the toy, take it away immediately.
Ready to Roll? No-Sew Catnip Pouch Step-by-Step
So you have a bored cat staring at you and a recycling bin full of cardboard tubes? Perfect. This specific project turns trash into treasure without you ever touching a needle or thread. It is basically the easiest way to make catnip toys at home, taking less than five minutes from start to finish, and frankly, my cats prefer these crunchy, smelly tubes over the expensive store-bought mice I bought last Christmas.
The Quick Breakdown
Action Required
Prep the Core
Flatten one end of the cardboard tube and fold it over to create a seal.
Wrap it Up
Insert the tube into a sock or wrap tightly with fabric scrap.
Fill the Void
Pour your organic catnip into the open end of the tube.
Seal the Deal
Tie the fabric ends tightly or knot the sock to close the pouch.
Gathering Your Materials: What You’ll Need
I once tore apart an old flannel shirt just for this, but an orphan sock works even better and saves you from cutting anything. You really don’t need much to get started on this do it yourself catnip toy with toilet paper roll project. Just grab a clean cardboard tube – toilet paper or paper towel size works – and some fabric large enough to cover it completely. Scissors are handy if you are using fabric scraps, but no glue or thread is required for this assembly.
Making the Pouch: A Simple How-To
It feels a bit like wrapping a burrito that refuses to stay closed, but hang in there. Start by crushing one end of the cardboard tube flat and folding it over firmly to seal the bottom. Slide this crushed end into your fabric or sock so it sits snug at the bottom. This creates the solid base for your no sew catnip pouch instructions, ensuring the good stuff doesn’t spill out onto your carpet immediately.
Once the tube is ensconced in the fabric, you have options for sealing the deal. If you’re using a long sock, you can simply tie a knot right above the cardboard insert – easy peasy. For flat fabric scraps, cut the excess material at the top into strips and tie them tightly together because cats absolutely love those dangly bits. Make sure those knots are incredibly tight since a determined tabby will work at them until they loosen up. It’s not just about containment; the texture of the cardboard crunching inside the soft fabric is a major sensory win for your pet.
Stuffing it Right: The Perfect Catnip Amount
Pouring the green gold is the best part, but don’t go overboard or you will just have a mess on the rug later. Fill the tube about halfway with high-quality, organic dried herb. Leaving air space allows the scent to circulate when your cat bats it around the kitchen floor. This balance is key when you make catnip toys at home to ensure maximum potency without wasting your stash.
Sometimes plain nip just doesn’t cut it for the older cats with high tolerances. Try mixing in a pinch of silvervine or even some crinkly plastic packaging – clean, of course – inside the tube before sealing. The extra noise combined with the scent drives them wild. Avoid using loose cotton stuffing inside the tube itself as it just dampens the smell and acts as a barrier. You want that potent aroma hitting their nose the second they sink their claws into the cardboard.
Wanna Make a Kicker Toy? Here’s How!
You might be surprised to learn that the best kicker toys aren’t the ones that look perfect, but the ones that can take a serious beating. You’re basically creating a long, tube-like pillow that your cat can grab with their front paws while furiously kicking with the back ones, which is a fantastic outlet for aggressive energy. Whether you want to break out the needle and thread or just tie some strategic knots, making diy catnip toys is a quick weekend project that costs pennies compared to the pet store versions and lets you customize the size exactly to your cat’s length.
Sewn or No-Sew: Which One’s Right for You?
Honestly, the durability difference isn’t as huge as people claim it is. If you can thread a needle, a simple running stitch creates a sleek finish that withstands claws a bit better, but no sew catnip pouch instructions are a total lifesaver for the non-crafty crowd. Tying off the ends of an old sock or using fleece strips creates a rugged, knotty texture cats actually dig their nails into. It really comes down to how much time you have and if you trust your knot-tying skills against a hunter’s instinct.
Picking Fabrics That Your Cat Will Love
That old pair of jeans you’re about to toss is actually gold for this project. Heavy-duty materials like denim or canvas stand up best to the intense bunny-kicking action kicker toys inspire. Soft fleece is another winner because it doesn’t fray easily when you cut it, making it perfect for those knot-tied ends. Just steer clear of loose knits that catch claws – you want the fabric to take a beating, not unravel the second your cat attacks.
Scent retention is the secret variable most people ignore when selecting material. Natural fibers like wool not only withstand puncture wounds but also hold onto that potent herb smell way longer than synthetics do. If you want to make catnip toys at home without spending a dime, raid your closet for materials that already carry your scent – it comforts your cat while they play. You also need to consider the mouth-feel since your cat will likely be gnawing on this thing.
Upcycled denim provides maximum durability for aggressive kickers.
Wool felt retains the catnip scent effectively over time.
Fleece strips work best for tying secure knots.
Perceiving the texture through your cat’s paws is key to picking a winner.
Squeezing in the Catnip: Tips for Success
Stuffing isn’t just about cramming the herb inside until it bursts. You actually want to mix the green stuff with poly-fil or fabric scraps to create a squishable texture rather than a rock-hard brick. If you’re doing a do it yourself catnip toy with toilet paper roll, the cardboard acts as the structure, so you can be generous with the herbs inside before sealing the ends. The goal is distributing the scent throughout the entire toy so every bite and kick releases a fresh wave of aroma.
Most folks just pour the dried leaves in and call it a day, but you need to activate the oils first. Give the dried catnip a firm pinch or crush between your fingers before it goes into the toy to release the nepetalactone – that’s the chemical that makes cats go bonkers. Also, consider layering the filling like a lasagna: stuffing, catnip, stuffing, catnip. This ensures the toy stays engaging even after the outer layer loses its potency.
Crush dried leaves to release important oils before stuffing.
Layer the filling to ensure long-lasting scent distribution.
Store in freezer to keep leftover herbs fresh.
Perceiving the strength of the aroma will tell you when it’s time for a refill.
Got Junk? Recycled Household Items Work Too!
You know that twinge of guilt when tossing a perfectly good cardboard tube into the bin? Stop doing it. Your recycling bin is actually a goldmine for free entertainment and you can easily make catnip toys at home without spending a dime. Cats rarely care about the price tag – they care about the texture and the smell. So instead of buying another plush mouse that will get lost under the fridge in five minutes, save your trash. It sounds weird, but your cat will thank you.
What Everyday Items Can You Repurpose?
Take a quick scan of your living room right now. That lonely sock missing its partner? It’s prime real estate for diy catnip toys. Clean cardboard tubes, empty tissue boxes, and even crumpled packing paper are fair game. Anything that makes a good crinkle sound or has a rough texture is a winner. Just be careful with plastic rings or anything small enough to swallow – choking hazards are real, so stick to larger items that can take a beating.
It is honestly hilarious watching a cat ignore a fifty-dollar climbing tree for a wad of paper. Repurposed items often have interesting textures and smells that store-bought plastics just can’t replicate. Cardboard shreds satisfyingly under claws, and old cotton t-shirts hold onto scents way better than synthetic polyester. You are basically giving them a sensory experience that mimics the outdoors, right in your living room.
Paper products naturally absorb oils, making them perfect scent vessels. When you sprinkle dried herbs onto cardboard or stuff them into paper bags, the scent lingers longer than on sleek synthetic fabrics. Plus, the crinkle factor of stiff packing paper mimics the sound of prey rustling in dry leaves – driving their hunting instinct wild. It’s messy, sure. You might find bits of cardboard on the rug. But the mental stimulation your cat gets from tearing apart a “prey” item you made from garbage is worth a quick vacuum later.
Creative Ideas to Spark Your Imagination
You don’t need a degree in engineering to pull this off. Simple modifications turn junk into treasure. If you’re looking for no sew catnip pouch instructions, an old baby sock tied in a knot is basically the holy grail of simplicity. Or try stuffing a worn-out mitten with fiberfill and herbs. The goal here is low effort, high reward.
Grab a cardboard tube and fold one end closed to create a seal. Fill it with a mix of dried herbs and maybe a small bell for sound, then fold the other end shut perpendicular to the first one. This do it yourself catnip toy with toilet paper roll creates an interactive puzzle feeder that forces your cat to bat and bite to release the smell. It is incredibly effective for bored cats. Because the cardboard is soft, they can sink their teeth into it – satisfying their urge to destroy without ruining your furniture.
Keeping it Clean: Care & Maintenance for Catnip Toys
Most people treat cat toys like they’re self-cleaning until the smell hits them, but saliva buildup is actually a major bacteria trap. Since you made these projects yourself, you know exactly what’s inside, which makes maintenance way easier than guessing with store-bought foam fillers. You don’t need a washing machine for everything. A simple spot clean usually works wonders on a do it yourself catnip toy with toilet paper roll core before it gets too soggy to save. Keeping the toy dry is the priority since moisture ruins the herb’s potency and weakens cardboard structures.
Cleaning Hacks: How to Keep Toys Fresh
Freezing is your best friend here because it kills bacteria without getting the fabric wet. Just toss the toy in a ziplock bag and leave it in the freezer overnight. For surface grime on those no sew catnip pouch instructions you followed, use a damp cloth with a tiny drop of vinegar – cats usually ignore the vinegar smell once it dries completely. Never soak a toy stuffed with cardboard or paper, obviously, or you’ll end up with a mushy, mold-prone mess that you’ll have to throw out immediately.
Can You Re-Stuff Them? The Answer’s Yes!
Since you didn’t sew these shut, opening them up to swap the filling is ridiculously easy. Untie the knot or unroll the sock top and dump out the stale herbs. It’s the single biggest perk of deciding to make catnip toys at home. You can refresh the filling every two weeks or whenever your cat loses interest. Fresh organic catnip is way more potent than the dust inside old toys, so you’re basically giving them a brand new toy for pennies without crafting anything new.
Silvervine is a total game changer if your cat seems bored with the standard stuff, so try mixing a pinch in with the nip during your next refill. Or, grab that crinkly packaging paper from your latest delivery – seriously, don’t throw it out – and stuff it in alongside the herbs for extra crunch. Since these are diy catnip toys, you control the potency and the texture. If the sock or fabric is getting loose, just double-knot it tighter this time. Adding a pinch of valerian root can also reignite the frenzy if you can stand the smell, which is pungent but cats absolutely love it.
When’s the Right Time to Toss Them?
Shredded fabric is a choking hazard, plain and simple. If you see loose threads that could wrap around a tongue or be swallowed, it’s trash time immediately. Ingested string causes linear foreign body obstructions, which are expensive and scary surgeries. Since these cost you almost nothing to make, don’t hoard them. If that toilet paper roll core is crushed flat or the sock heel is thinning out so much you can see the stuffing, pitch it and grab a new sock.
Give it the sniff test, and I don’t mean checking for catnip strength. If it smells like mildew or old wet gym clothes, it’s done. Mold spores can grow inside damp stuffing within 24 hours if the toy gets dunked in the water bowl, which happens way more than you’d think during playtime. Because you didn’t spend $10 at the pet store on this, there’s zero guilt in tossing it. Better to spend five minutes making a fresh one than risking a respiratory issue for your cat. Safety always wins over saving a raggedy sock.
FAQ Time: What You Really Want to Know
With the recent explosion of organic and silvervine blends hitting the pet market, you might be wondering if your standard garden-variety herb is still good enough for these projects. It creates a bit of confusion. You’ve got your materials ready, but there are always those lingering doubts about potency and safety that keep you from finishing. So let’s tackle the stuff that actually matters when you make catnip toys at home, getting straight to the point without any fluff.
How Much Catnip Should You Use?
It is incredibly tempting to pack that sock until it’s bursting at the seams, but hold your horses. A single tablespoon of high-quality dried herb is usually plenty for a standard kicker or pouch. Cats have noses that are roughly 14 times stronger than yours, so they don’t need a massive amount to get that happy buzz. Overfilling just leads to spills on your carpet later, which is a mess you definitely don’t want to vacuum up. A little really does go a long way here.
Storage Ideas: Keeping Catnip Toys Fresh
Ever notice how a toy loses its mojo after a week under the sofa? To stop that, you need to rotate them out. The freezer is actually your best friend here. When your cat loses interest in that do it yourself catnip toy with toilet paper roll, toss it in a Ziploc bag and stick it next to your frozen peas. The cold helps preserve the crucial oils, specifically nepetalactone, which is the chemical that makes your kitty go absolutely bonkers.
You can actually “recharge” old toys using this method too. Just sprinkle a teaspoon of fresh dried leaf into the bag with the old fabric toys before sealing them up. It is basically like marinating a steak. Leave it for a few days so the fabric absorbs the scent again. This works wonders for those no sew catnip pouch instructions we talked about earlier since fleece holds onto scents like crazy. Don’t leave toys out 24/7 or your cat becomes nose-blind to the smell.
Frequently Asked Questions – The Answers You Need
Safety is usually the big worry for new DIYers. The good news is that catnip is non-addictive and completely safe to eat, though eating too much fresh plant matter might cause a mild tummy ache. Also, don’t panic if your kitten ignores your hard work. About 30 percent of cats don’t have the gene to react to it at all, and kittens under six months usually haven’t developed the sensitivity yet. It’s not your crafting skills – it’s just biology.
If you find out your cat is in that non-reactive percentage, you aren’t out of luck. There’s been a huge uptick in people using Silvervine or Valerian root as alternatives in their DIY projects. You can use the exact same no-sew methods – just swap the filler. Silvervine actually works on about 80 percent of cats, so it is a solid backup plan if the traditional stuff fails to get a reaction. It’s all about finding what triggers that play instinct.
The Real Deal About Catnip: What You Should Know
Nepetalactone is the volatile oil found in the leaves and stems that triggers that euphoric reaction, basically mimicking feline sex hormones. It’s wild to think about, but about 30% to 50% of cats don’t even have the gene to react to it, so don’t be discouraged if your furball ignores that diy catnip toy with a toilet paper roll you just spent ten minutes making. For the responders, though, sniffing usually stimulates them while eating it acts as a sedative. It’s totally non-addictive, meaning they won’t go through withdrawals if the toy gets lost under the fridge.
Is Catnip Safe for All Cats?
Kittens under six months old typically haven’t developed the sensitivity yet, so stuffing a no sew catnip pouch for a tiny baby is mostly a waste of good herbs until they hit puberty. While catnip is technically safe and non-toxic for felines of all ages, very senior cats might find the sudden burst of frantic energy a bit too stressful on their joints or hearts. And if you have a pregnant queen, steer clear – it can stimulate the uterus. Always watch how your specific cat handles the excitement before tossing them a giant kicker.
When Cats Go Crazy: Understanding Play Behavior
The euphoric effect only lasts for about 10 to 15 minutes before your cat becomes temporarily immune to the smell for an hour or two. During that window, you might see cheek rubbing, vocalizing, drooling, and bunny-kicking, which are all natural responses to the pheromone mimicry. It looks intense, but it’s just their way of burning off that sudden sensory overload. If you make catnip toys at home, expect them to get absolutely shredded during these sessions because the prey drive kicks into overdrive – it’s a good sign they’re having fun, not that they’re actually angry.
Aggression can sometimes spike if the cat gets overstimulated, turning a fun play session into a scratchy situation for your ankles. Since the herb triggers predatory instincts, that “bunny kick” they do on your no-sew kicker is actually a kill move in the wild. If you notice flattened ears, growling, or tail twitching that looks more angry than playful, it’s time to step back and let the high wear off naturally. Don’t try to pet them when they are in the zone. Just let them destroy the toy you made – that’s what it’s there for, right? It saves your furniture and hands from taking the brunt of that chemically induced energy burst.
Can You Overdo It? Limits on Catnip Usage
Olfactory fatigue is a real thing, meaning if you leave fresh herbs out 24/7, your cat will stop reacting entirely. While it’s impossible to fatally overdose on the stuff, eating too much dried plant matter can cause vomiting or diarrhea just like eating too much grass would. You don’t want to come home to a pile of sick on the rug. Limiting access keeps the magic alive. Treat these sessions like a special event rather than a daily buffet to keep their interest peaked.
Rotating your toys is the best hack for this – keep your stash of homemade kickers in a sealed container in the freezer when they aren’t being used. This preserves the potency of the necessary oils and stops your cat from becoming desensitized to the smell. If you just leave that do it yourself catnip toy with the toilet paper roll lying on the living room floor for weeks, it just becomes a boring piece of trash to them. Bring it out once or twice a week for maximum impact. This routine actually mimics the thrill of the hunt, making the reward way more satisfying when they finally get their paws on it again.
There is a weird satisfaction in watching your cat destroy something you made from trash – literally, like a cardboard tube. Making catnip toys at home gives you total control over the potency and the safety materials, something you just don’t get with mass-produced items. Plus, you aren’t paying a premium for fancy packaging that ends up in the bin anyway. While store-bought options are convenient, they often sit in warehouses for months losing their scent, whereas your homemade projects are fresh and hit way harder.
Why DIY Cat Toys Save You Cash
Pet stores charge a ridiculous markup for what is crucially fabric scraps and a pinch of herb. By using no sew catnip pouch instructions and materials you already have lying around – like that unmatched sock or an old t-shirt – your cost drops to almost zero. You’re only paying for the fresh catnip itself, meaning you can make twenty toys for the price of one store-bought kicker. It’s simple math that keeps your wallet happy while keeping your cat entertained.
The Joys of Personalization: Make it Yours
You know your cat’s quirks better than any manufacturer ever could. Maybe your tabby goes nuts for crinkle sounds but hates bells, or perhaps they need a do it yourself catnip toy with toilet paper roll because they love shredding cardboard. When you DIY, you tailor the texture, size, and noise level specifically to your pet’s prey drive. It’s bespoke gear for your hunter without the boutique price tag.
Freshness is the other massive factor here since commercial toys might have been sitting in a warehouse for six months, losing their potency by the day. When you create these yourself, you control the freshness of the fill. You can stuff that kicker until it’s bursting with premium organic leaf or silvervine if your cat is picky. You control the intensity, ensuring your feline gets the maximum effect every single time they latch onto it.
Store-Bought vs. Home-Made: The Pros and Cons
Convenience is really the only thing keeping the big pet toy companies in business. Sure, grabbing a toy off the rack is faster than gathering supplies for diy catnip toys, but you sacrifice quality control. There is a trade-off between the time you spend knotting a fleece strip and the instant gratification of a purchase, but the durability of home-knotted fleece usually wins out.
Comparison Factor
The Verdict
Cost Efficiency
DIY wins easily – uses household waste and bulk herbs.
Durability
DIY allows you to reinforce knots and double-layer fabric.
Safety Hazards
Store-bought often has glued parts that can be swallowed.
Potency
Homemade is fresher; store toys go stale on shelves.
Time Investment
Store-bought is instant; DIY takes 10-30 minutes.
Customization
DIY lets you pick the specific texture your cat likes.
Safety standards for pet toys aren’t as regulated as you might think. I’ve seen expensive store-bought mice shed plastic eyes or feathers within minutes, posing a serious choking hazard. When you build it, you know the structural integrity because you tied the knots yourself. You decide to skip the glued-on sequins and stick to safe, shreddable fabrics. That peace of mind is worth the ten minutes it takes to assemble a toy.
Factors to Consider When Crafting Catnip Toys
We’ve seen a massive spike in upcycling lately, probably because everyone has cardboard laying around waiting to be used. Before you start cutting up old socks or trying a do it yourself catnip toy with toilet paper roll, you need to think about the end user – your cat. It’s not just about stuffing herbs into a sock; it’s about making sure the toy fits their play style and keeps them safe without falling apart in five seconds.
Complexity of diy catnip toys versus your actual time availability.
Fabric strength required for no sew catnip pouch instructions.
Toxicity of household items used to make catnip toys at home.
Any toy you create needs to be inspected regularly for wear and tear.
Your Cat’s Preferences: What They Like
Does your cat bunny-kick everything into oblivion or just nuzzle things gently? You’ve gotta tailor the project to them. If they love wrestling, a larger kicker made from a sturdy sock is the way to go, but if they prefer batting things around, a lightweight do it yourself catnip toy with toilet paper roll is perfect. Some cats go crazy for crinkle sounds – try stuffing a candy wrapper inside – while others just want pure, potent herbs. Pay attention to what they actually play with before you raid the recycling bin.
Safety First: Avoiding Harmful Materials
It’s easy to get carried away with decorations, but keep it simple. Avoid anything that can be swallowed, like loose strings, buttons, or glued-on eyes that pop off too easily. When following no sew catnip pouch instructions, make sure the knots are tight so the filling doesn’t spill out. Toxic materials are a hard no – stick to natural fabrics like cotton or wool. Plastic bags can be dangerous if chewed, and certain glues give off fumes that are bad for tiny lungs.
You really have to watch out for the “cute factor” versus safety. Feathers are a classic example – they look fun, but if your cat swallows a quill, it can cause internal blockages or throat injuries. Same goes for yarn ribbons; they look great on a diy catnip toys project, but linear foreign bodies are a vet’s nightmare. Stick to untreated cardboard and clean fabrics. If you’re upcycling old clothes, ensure there’s no leftover detergent residue that could irritate their mouth. Better safe than sorry when you make catnip toys at home.
Durability Matters: Choosing Long-Lasting Options
A flimsy toy won’t last five minutes against a determined hunter. If you have a chaotic shredder, flimsy paper won’t cut it. You need materials that can take a beating, like denim from old jeans or thick fleece. These fabrics hold up way better than thin cotton t-shirts when claws get involved. When you make catnip toys at home, double-layering the fabric adds extra life to the toy without needing a sewing machine.
Think about the mechanics of the toy. If you’re just folding over a toilet roll, it’s going to get crushed immediately. But if you stuff that roll tightly with paper scraps or fabric remnants before sealing the ends, you create a much denser, satisfying object for them to bite. For fabric projects, using the braiding technique with fleece strips creates a nearly indestructible tug toy. The tighter you pack the catnip and stuffing, the harder it is for them to rip a hole in it. Denim is basically the gold standard here – it’s tough, holds scent well, and gives their claws something to really sink into without shredding instantly.
Seriously, Does Fabric Matter? The Lowdown
You might think grabbing any old sock works for diy catnip toys, but the material actually dictates safety and longevity. If you pick something flimsy, your cat shreds it in seconds and potentially swallows thread; pick something too thick, and they can’t smell the herb. It’s a balance. Since we are focusing on no sew catnip pouch instructions, the fabric needs to hold a knot well without slipping. You don’t want to come home to a green mess on the carpet just because the fleece was too slippery to stay tied tight.
Choosing Pet-Friendly Fabrics
Stick to natural fibers whenever possible because synthetic dyes can sometimes cause allergies in sensitive kitties. 100% cotton, wool felt, or unbleached muslin are your best bets when you make catnip toys at home. Old denim from worn-out jeans is fantastic – it’s tough, holds a scent, and is usually free of loose threads that could cause choking. Fleece is okay too, especially for those tie-knot projects, but keep an eye on it for pilling. If you can wash it in hot water without it falling apart, it’s generally safe for your cat’s mouth.
Avoiding Toxic Substances: The Must-Know List
Never use materials treated with fire retardants or stain repellents, as these chemicals are easily ingested during grooming sessions post-play. You also need to check for glitter, sequins, or glued-on eyes that are basically instant choking hazards. Even that cute do it yourself catnip toy with toilet paper roll needs a quick check – ensure the roll doesn’t have leftover scented glue or chemical residue. Anything with long strings, yarn that unravels easily, or loose ribbons is a hard no because of the risk of linear foreign body ingestion, which is a terrifyingly expensive vet visit.
It’s easy to overlook, but the stuffing matters just as much as the outer shell. Avoid using those little polystyrene bean bag beads or plastic shopping bags that can cause suffocation if the toy rips open. Instead, stick to polyester fiberfill, cotton batting, or even scrap fabric strips from your old t-shirts. If you are repurposing old clothes, check the labels for “wrinkle-free” treatments, which often use formaldehyde. Your cat is going to be slobbering all over this, so if you wouldn’t put it in your own mouth, don’t let them chew on it.
Fabrics That Hold Up to Scratching and Chewing
Cats are brutal on their toys, so durability is the name of the game. Heavy-duty canvas and upholstery fabric are absolute champions for kicker toys because they withstand those aggressive bunny kicks. If you want something softer but still strong for diy catnip toys, go for wool felt – not the cheap craft acrylic kind, but thick, matted wool. It doesn’t fray when punctured by claws. Denim is another powerhouse here; the tight weave prevents teeth from snagging and ripping holes, keeping the catnip safely inside where it belongs.
While fleece is popular for no sew catnip pouch instructions because it doesn’t fray when cut, it isn’t indestructible. A determined chewer can gnaw through a single layer pretty fast. To combat this without sewing, try layering two pieces of fabric together before tying your knots. This double-layer technique adds a protective barrier that buys you way more time before a replacement is needed. Just check the toy weekly for wear and tear – once you see the inner stuffing or the catnip starts leaking, toss it. It’s cheaper to make a new one than risk ingestion.
Top Tips for Cat Toy Creation You’ll Love
You probably think any old scrap fabric works, but texture is actually king when you make catnip toys at home. Cats go absolutely wild for rougher materials like denim or wool that really grip onto scents and withstand claws better than slippery synthetics. If you are following no sew catnip pouch instructions, ensure you double-knot those fleece strips to stop loose threads from becoming a choking hazard. It’s not just about the filling – the outside matters just as much.
Refresh old toys by marinating them in a sealed jar with fresh organic catnip.
Reinforce your do it yourself catnip toy with toilet paper roll ends with non-toxic glue.
Supervise play with diy catnip toys containing feathers or long strings.
The best toys are the ones that keep your cat safe and entertained.
Experimenting with Colors and Patterns
Your cat doesn’t actually care if the fabric matches your sofa – they can’t even see most of those colors anyway. What really catches a feline’s eye is high contrast, like black and white stripes or erratic patterns that mimic movement. When picking socks or fabric scraps for these projects, go for bold geometries rather than subtle pastels. It makes the toy easier for them to track across the floor during “hunting” mode. Even a simple sock becomes a high-value target if the pattern is loud enough.
Silence is sometimes golden, especially if your cat is the anxious type who gets spooked by loud noises. While bells are classic, a crinkle sound often triggers a stronger predatory response because it sounds like scurrying prey in dry leaves. You can easily achieve this by stuffing a clean candy wrapper or empty crisp packet inside the sock before tying it off. Test your cat’s reaction to a jingle ball first – if they bolt under the bed, stick to silent or crinkly fillings for their sanity.
If you do decide to go the noisy route, safety has to be the priority. Never attach a bell to the outside of a no-sew project where a claw could get snagged in the metal loop or, worse, the bell could be ripped off and swallowed. Instead, bury the noise-maker deep inside the stuffing of your diy catnip toys. A small plastic container with a few grains of uncooked rice makes a fantastic, safer rattle that isn’t as piercing as a metal bell. It drives them nuts – in a good way – without risking a vet visit for a foreign object obstruction.
Getting Creative: Beyond the Basics
A kicker doesn’t have to look like a sausage to be effective. Try knotting three old t-shirt strips together to create a braided tug toy that doubles as a dental cleaner. You can marinate these braids in a jar of catnip for a few days to make them irresistible without needing a pouch. Incorporating natural elements like huge feathers or even a bit of untreated sisal rope adds sensory variety that keeps boredom at bay. It’s about mixing up the mouth-feel for your predator.
Don’t just stop at fabric shapes. You can repurpose cardboard deliveries into puzzle feeders that hide your handmade toys. Cut small holes in a small box, toss in your do it yourself catnip toy with toilet paper roll, and watch your cat work to fish it out. This engages their brain way more than just tossing a toy on the rug. It turns playtime into a problem-solving mission. Plus, rotating these homemade creations in and out of circulation makes old toys feel brand new again, saving you money and keeping your cat’s interest peaked for way longer.
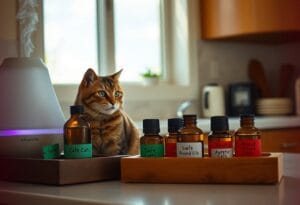
What About Scent? The Catnip Factor
Nepetalactone is the volatile oil responsible for flipping that switch in your cat’s brain, affecting roughly 70% of the feline population. It is wild that not every kitty inherits the sensitivity gene, so don’t panic if your cat ignores your hard work initially. You are aiming for a euphoric reaction – the kind where they bunny-kick the toy into oblivion. Since you’re putting effort into these diy catnip toys, understanding the chemistry helps you pick the good stuff because without potent scent, that sock is just a sock.
Different Types of Catnip: Finding What Works
Dried leaves and buds remain the gold standard because they hold the highest concentration of oils compared to stems or dust. Silver vine is a fantastic backup plan if your cat is part of the 30% that doesn’t react to traditional nip. While sprays are convenient for refreshing a do it yourself catnip toy with toilet paper roll, the scent evaporates way faster than solid matter. You might prefer pellets for weight, but they can be harder for the cat to smell through thick fabric.
Organic dried leaf (high potency)
Silver vine powder (for resistant cats)
No sew catnip pouch instructions usually work best with coarse cuts
Compressed pellets (less mess)
Any make catnip toys at home project relies on testing what your specific cat prefers before buying in bulk.
Loose Leaf & Buds
Best overall for stuffing pouches due to high oil concentration and texture.
Silver Vine
Ideal alternative for cats who don’t have the genetic receptor for regular catnip.
Catnip Spray
Great for soaking cardboard or refreshing old felt toys, but fades quickly.
Compressed Pellets
Adds rattle noise and weight but needs crushing to release the full scent.
Valerian Root
Strong, musky odor that triggers play aggression in many cats indifferent to nip.
Alternatives to Catnip: Other Filler Ideas
Valerian root actually affects a higher percentage of cats than catnip does and often triggers the same intense play aggression. It smells like old gym socks – fair warning – but cats absolutely lose their minds over it. If you are following no sew catnip pouch instructions, mixing in crinkle paper or dried honeysuckle gives a texture variety that keeps them engaged longer. Some cats even prefer the wood chips of Tatarian honeysuckle.
You can get creative with what’s inside to stimulate more than just their nose. Crinkle material from clean chip bags or a small bell adds an auditory element that drives hunters crazy. Tatarian honeysuckle wood is another weird one that works wonders because about 30% of cats who don’t care about nip will react to the sawdust or chips. It is great because it’s distinct from food smells. You want to engage all their senses, especially if you have a lazy hunter who needs extra motivation to get off the couch.
The Importance of Freshness: Storing Catnip Right
Essential oils degrade within six months if exposed to light and air, turning your potent herbs into dusty, useless tea leaves. That bag you bought three years ago is likely dead. Keeping your stash in the freezer extends the life significantly and keeps those oils potent for your next crafting session. Strong scents are the only thing that matters here. If you can’t smell it, your cat probably won’t care about it either.
Mason jars are your best friend here. Plastic bags are okay, but the oils can actually seep into cheap plastic over time, weakening the product and making a mess. If you grow your own, dry it in a dark place before jarring it up to preserve the potency. And don’t pre-fill every toy you make. Keep the filler separate until you’re ready to hand over the toy so the diy catnip toys hit with maximum impact the second they hit the floor. It is the difference between a polite sniff and a full-on attack.
The Pros and Cons of Making Your Own Cat Toys
Americans spend over $100 billion on pets annually, but a huge chunk of that goes to toys your cat ignores after five minutes. It’s frustrating watching them prefer the shipping box over the $20 kicker you just bought. By venturing into diy catnip toys, you aren’t just saving cash – you’re customizing the experience for your specific furball. Plus, using stuff like old socks or a cardboard tube means you’re upcycling instead of adding to a landfill. But it isn’t always perfect, and you need to weigh the effort against the durability.
Pros
Cons
Significantly cheaper than pet store prices
Materials may not hold up to aggressive chewers
You control the freshness and potency of the catnip
Requires regular safety inspections for loose parts
Great way to upcycle old clothes and cardboard
Can be messy to assemble (loose herbs everywhere)
Customizable shapes and sizes for your specific cat
No-sew knots can come undone during play
Immediate gratification – make it and play now
Doesn’t look as polished as commercial products
Reduces plastic packaging waste
Short lifespan for paper-based toys
The Benefits You Can’t Ignore
Freshness is the biggest game changer here because store-bought nip sits on shelves for months losing potency. When you make catnip toys at home, you control the herb quality – maybe even using fresh stuff from your garden. You also get to pick the texture your cat actually likes. If they hate crinkle sounds, you just leave the plastic out. It’s totally up to you. And honestly, seeing them bunny-kick something you made from an old t-shirt feels pretty great.
The Challenges You Might Face
Cardboard has a tensile strength far lower than commercial fabric, meaning a do it yourself catnip toy with toilet paper roll might get shredded in seconds by an aggressive chewer. Durability is the main headache here. Without industrial stitching, things fall apart faster. You have to be okay with the fact that these are often temporary distractions rather than heirloom items. It can be annoying to sweep up cardboard confetti ten minutes after you finished making the toy.
Safety is the other big thing that keeps owners up at night. Since you aren’t using a machine to lock seams, no sew catnip pouch instructions rely heavily on knots and ties. If those come loose, you risk your cat swallowing string or stuffing. You have to inspect these things constantly.
Loose parts are a choking hazard.
And let’s be real about the mess – high-grade catnip gets everywhere when you’re stuffing a sock. You’ll probably find green flakes in your carpet for weeks after a crafting session.
Finding Balance: When to DIY and When Not To
Commercial toys must pass specific safety standards regarding toxicity and construction, whereas your living room workshop has zero regulation. So, if your cat is a “destroyer” who eats fabric, stick to heavy-duty store-bought kickers. But for light players or scent-motivated cats? DIY is the way to go. It really comes down to your cat’s play style. If they just nuzzle and lick, homemade is perfect.
It doesn’t have to be all or nothing. I usually keep a mix. I buy the ultra-tough toys for unsupervised play when I’m at work, but I whip up diy catnip toys for interactive sessions when I can watch them. That way, if a knot slips on a no-sew project, I’m right there to snatch it away.
Supervision is non-negotiable with homemade gear.
Save the DIY efforts for when you want to rotate toys cheaply or test if they even like a specific shape before dropping real money on a durable version.
Little Extras: Making Toys Even More Fun
Plain socks work, but texture is king in the cat world. By tossing in a few crinkly bits or dangly ends, you turn a standard kicker into a high-value target that mimics real prey. It doesn’t take a master crafter to do this, either. Just a few knots or a hidden layer of plastic can trigger those predatory instincts instantly. You want the toy to feel alive when they bite down.
Adding Feathers and Tails: The Fun Factor
Tying a few craft feathers or leather strips to the end of your sock knot changes everything. It creates that erratic movement cats go crazy for. If you’re following the no sew catnip pouch instructions, just slip the quill ends into the knot before pulling it tight – gravity does the rest. Even a shoelace hanging off the end acts like a mouse tail, giving your kitty something to grab onto during a bunny-kick session.
Durable Add-ons: Making Toys Last Longer
Double-bagging isn’t just for groceries. If you have a heavy chewer, slide your finished project inside a second sock or a sleeve of old denim for an armored layer. This is especially smart if you make catnip toys at home using thinner fabrics that might rip under intense clawing. It keeps the messy herbs inside where they belong and adds a satisfying bulkiness for your cat to wrestle.
Cardboard is your best friend for structure. When you build a do it yourself catnip toy with toilet paper roll, try wrapping the cardboard core in sisal rope or thick wool yarn before stuffing it into the fabric. The rope adds a scratch-post texture that helps clean teeth while they bite, and the cardboard tube prevents the toy from collapsing too quickly. Just be sure to secure ends tightly so no string comes loose – swallowing yarn is a dangerous choking hazard you need to avoid.
Gift Ideas: Surprise Your Feline Friends!
Your friends’ cats deserve some homemade love too. Since these diy catnip toys cost pennies to make, you can easily whip up a batch of five or six in under an hour for holiday swaps or shelter donations. Bundling them with a fresh jar of dried silvervine or a cute ribbon makes it look like a boutique item, even though you just upcycled old t-shirts.
Freshness is the secret sauce here. To make the gift really pop, marinate the finished toys in a sealed container with loose, high-potency catnip for at least 24 hours before handing them over. The fabric absorbs the oils, making the scent explosively strong when the package is finally opened. You can even write out a little card with care instructions – like “squeeze to release scent” – to help new owners get the most out of your handmade creation.
Conclusion
From above, it’s pretty clear that your cat won’t judge your lack of sewing skills as long as the herbs are fresh. You really don’t need fancy equipment to make catnip toys at home that drive kitties wild. Just follow the no sew catnip pouch instructions or try that quick do it yourself catnip toy with toilet paper roll – it’s a great way to recycle stuff you’d usually toss. These diy catnip toys are going to get shredded and drooled on eventually, so don’t overthink it – just enjoy watching your little hunter go crazy.

")
")
")


")