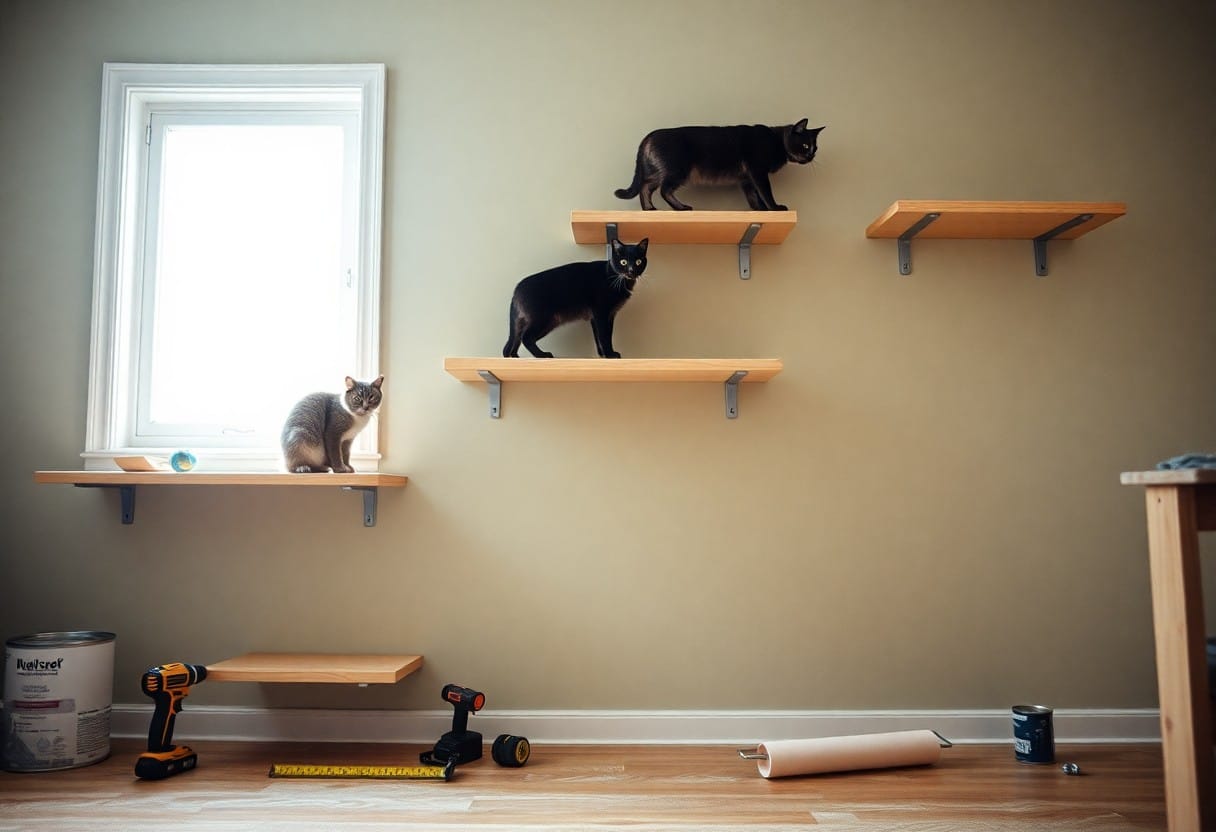
Cat wall shelves let you create a vertical playground that saves space, entertains pets, and stays affordable; you must anchor shelves to studs to avoid falls, and use sturdy materials for safety while enjoying a low-cost, high-impact upgrade.
Planning Your Vertical Layout
Plan your vertical layout to maximize play while fitting your room’s flow; mark heights for jumping, resting, and viewing. Balance platforms so you create ascending paths, and leave clear floor space for safe landings. You should cluster heavier perches near wall studs and keep fragile items out of reach.
Assessing Wall Space and Stud Placement
Check walls with a stud finder so you anchor platforms to structural studs, not just drywall. You should measure to avoid blocking vents or switches, and keep perches within reachable distances for your cat. Use rated anchors if studs are sparse and avoid overloading a single point.
Designing a Safe and Engaging Climbing Path
Map a climbing path that alternates platforms, ramps, and scratching posts so your cat can ascend naturally. Keep jumps under two body lengths and place soft landing zones below high shelves. You should avoid narrow ledges and provide stable supports to prevent falls.
Add staggered platform depths and varied textures to test agility; aim for six to twelve inches of vertical between steps so you keep jumps safe. Anchor heavy units into at least two studs, inspect anchors periodically, and cover sharp edges to reduce risk of injury. This increases play value and stability.
Budget-Friendly Materials and Essential Tools
Budget-friendly materials like reclaimed pine, plywood, or MDF let you build sturdy cat shelves; choose heavy-duty brackets and save by using scrap wood and basic hand tools to keep costs low without compromising safety.
Sourcing Affordable Wood and Heavy-Duty Brackets
Sources such as local lumber yards, Habitat ReStore, and online marketplaces help you find discounted boards; pick straight, crack-free planks and heavy-duty brackets rated for your cat’s combined weight.
Necessary Equipment for Secure Installation
Basic equipment includes a power drill, stud finder, level, tape measure, screws, and wall anchors; pre-drill pilot holes and secure brackets into studs whenever possible to prevent shelf failure.
Tools you’ll rely on include a drill with clutch control and multiple bits, a dependable stud finder, a calibrated level, and a torque-limited driver; wear eye protection when drilling, use proper wall anchors if no studs are available, and always pre-drill to avoid wood splitting or stripped screws.
Plywood or MDF, L-brackets, screws, adhesive-backed non-slip tape, padding scraps
Cutting, Sanding, and Preparing the Shelves
Wear protective gear, mark and clamp boards, cut to size with a fine-tooth blade, sand edges smooth, and test fit; remove dust before finishing to ensure secure mounts.
Applying Non-Slip Surfaces and Comfort Padding
Apply adhesive-backed non-slip tape or carpet remnants, press firmly and trim edges; choose non-toxic materials and avoid loose staples that could injure your cat.
Choose materials like thin carpet, sisal, EVA foam, or rubber grip strips; apply spray or contact adhesive in a well-ventilated area and use non-toxic adhesives. Trim edges flush, cover staples with glue or fabric tape, and stitch padding underneath if needed to prevent chewing. Finally, test with your cat for traction and adjust if padding shifts or frays.
Secure Mounting and Installation Techniques
Measure wall studs and mark mounting points, then select brackets rated above your cat’s combined weight and activity level; use studs or high-capacity anchors to reduce fall risk.
Identifying Weight Limits and Anchor Types
Check bracket specs and wall material to match the weight limit and proper anchor. Assume that you pick toggle bolts for drywall, lag screws for studs, and avoid light plastic anchors.
Studs
Toggle bolts
Lag screws
Masonry anchors
Wall type
Recommended anchor
Stud (wood)
Lag screws
Drywall (no stud)
Toggle bolts
Concrete/masonry
Masonry anchors
Light loads/small cats
50-75 lb rating per point
Ensuring Structural Integrity for High-Energy Play
Reinforce mounting points with plywood backing or metal plates so you spread jump forces into studs; test shelves with gradual weight and watch for wobble to avoid collapse.
Use plywood backing spanning at least two studs, run multiple lag screws per bracket, and space platforms to dissipate impact; you should inspect fasteners regularly, replace any frayed straps, and consider a professional if wall material is questionable to prevent injury or structural failure.
Enhancing the Vertical Playground
You can boost play value by mixing levels, textures, and sightlines; attach shelves to studs, check weight limits, and avoid unstable fasteners to keep your cats safe while maximizing climbing and jumping fun.
Integrating Bridges, Sisal Wraps, and Scratching Posts
Bridges and sisal-wrapped posts let you create travel lanes; you anchor bridges to studs, wrap posts with sisal for durable texture, and place scratching posts near rest spots to protect furniture.
Creating Elevated Resting Pods and Hideaways
Pods and hideaways give cats secure retreats; you mount them at varied heights, pad interiors with washable cushions, and ensure openings allow easy exit while keeping supports firmly anchored to studs.
Install pods from 3/4″ plywood or solid wood, use heavy-duty brackets or lag bolts into studs, and pre-test each perch with extra weight. You should round entrances, secure removable cushions with Velcro for washing, add non-slip surfaces, and include ventilation; avoid short drywall anchors or thin screws that can become dangerous under repeated jumps.
Safety Standards and Cat Training Tips
Safety dictates: follow DIY Cat Wall Shelves specs and use tested anchors.
Anchor into studs or heavy-duty anchors.
Test platforms for vertical playground loads.
Choose non-toxic finishes on a budget.
Thou, supervise first climbs and inspect mounts monthly.
Eliminating Hazards and Sharp Corners
Trim sharp edges, sand platforms, and cover exposed screws; secure loose hardware, hide cords, and replace small detachable parts to prevent swallowing.
Using Incentives to Encourage Exploration
Use treats, catnip, and toys to lure your cat onto shelves; place perches near windows and reward calm behavior.
Rotate rewards and start with a clicker or your cat’s favorite treats, move rewards higher in small steps, praise calm descents, and never leave dangling strings unattended.
Final Words
From above you can see how simple, low-cost shelves create vertical playgrounds for climbing, perching, and play; you assemble sturdy platforms with basic materials and secure mounting to maximize space and keep cats safe.
FAQ
Q: How do I plan and measure wall space for a budget-friendly cat shelf system?
A: Plan your layout by observing where your cat already jumps, climbs, or naps. Measure the total wall height and mark a vertical route that allows cats to travel from floor to high perch in several comfortable steps. Allow 12-24 inches of vertical space between platforms for average adult cats and 8-12 inches for kittens or senior cats; increase spacing for larger breeds. Aim for 8-12 inches of shelf depth for perching and 12-18 inches for lounging platforms. Factor in weight capacity by designing each shelf to support 30-40 pounds if you expect multiple cats to jump or sit together. List basic materials (3/4″ plywood, L-brackets or floating shelf brackets, wall anchors or wood screws, carpet or sisal, wood glue, paint) and keep a simple budget by sizing boards to standard lumber widths to reduce waste.
Q: What are clear step-by-step instructions to build and safely install simple cat wall shelves?
A: Cut plywood to your chosen dimensions and sand all edges smooth to prevent splinters. Attach carpet remnant or sisal to the top of each board using a staple gun or contact adhesive, folding edges under for a clean finish. Use a stud finder to locate studs and mark mounting points at the stud centers; predrill pilot holes to prevent wood splitting. Mount sturdy L-brackets or heavy-duty floating shelf brackets to studs with 2.5-3″ wood screws, and secure the shelf to the brackets with shorter screws through the bracket holes. Test each shelf by applying gradual weight equal to two heavy cats before allowing feline access and check for any wobble; tighten fasteners or add additional support if needed. Introduce cats to the new shelves slowly by placing treats, toys, or bedding on lower platforms and moving rewards higher as confidence grows.
Q: How can I make the shelves engaging for cats and keep costs low while maintaining safety?
A: Wrap exposed edges or corners with sisal rope to create scratching areas and prevent wear on coverings. Paint boards with low-VOC, non-toxic paint and seal with a water-based polyurethane for easy cleaning without harmful fumes. Repurpose materials like old crates, picture ledges, or thrift-store shelves to form platforms and hideaways; reinforce these pieces with additional bracing where necessary. Add features such as small ramps, boxes, hanging toys, and cozy cushions to encourage exploration and resting spots. Inspect mounting hardware and coverings monthly, tighten any loose screws, and replace carpet or rope when fibers break down to maintain traction and safety.


")