There’s a delightful world waiting for you in homemade cat treats! By creating treats yourself, you can ensure quality ingredients and cater to your cat’s specific tastes and dietary needs. This guide provides you with important tips, tricks, and easy recipes to whip up treats that your feline friends will love. Say goodbye to store-bought options filled with preservatives and hello to tail-wagging happiness in your kitchen. Let’s launch on this fun and rewarding journey together!
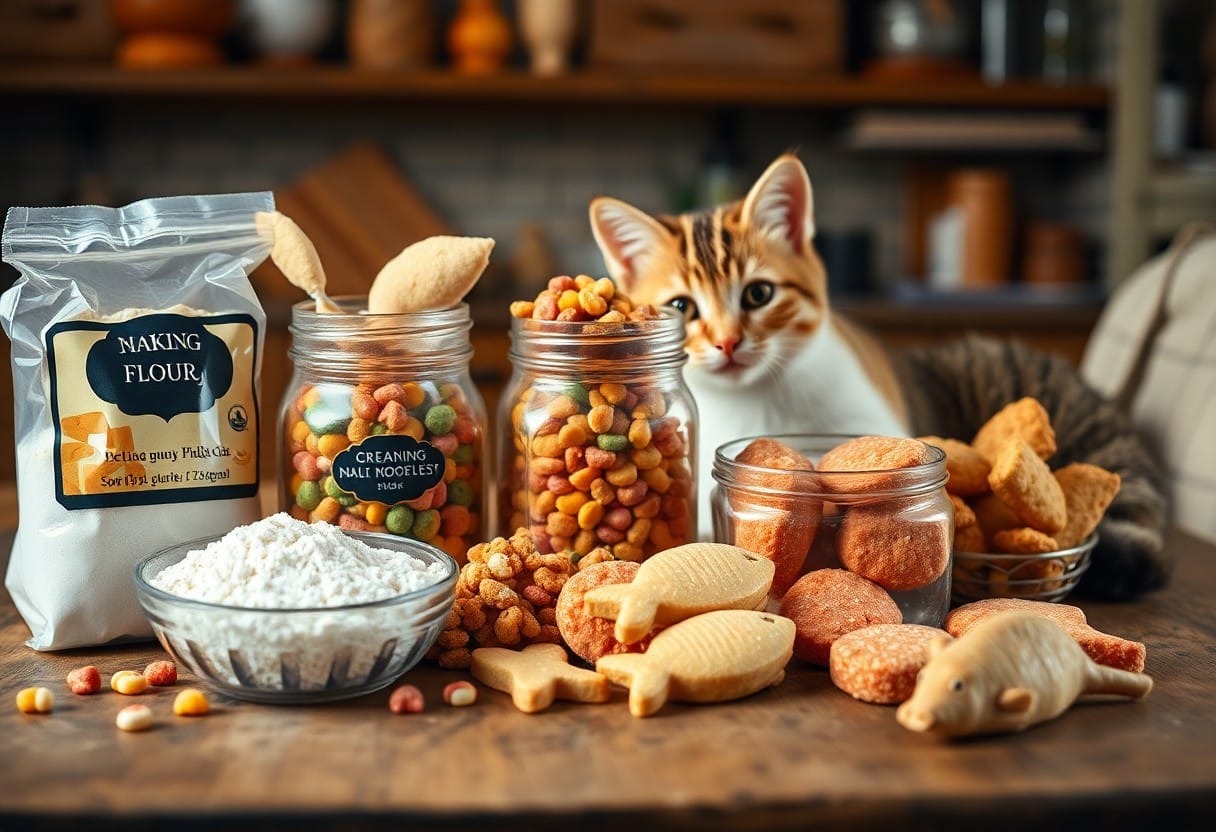
Homemade cat treats can be simple to make by using common ingredients like tuna, chicken, and various vegetables, allowing you to create delicious and healthy snacks for your cat.
Incorporating different flavors and textures can keep your cat engaged and excited about treat time; consider using broth or pureed ingredients for added moisture and taste.
Storage and shelf-life are important; properly baking and storing treats can extend their freshness, ensuring your cat always has a tasty option available.
Types of Homemade Cat Treats
Before plunging into the world of homemade cat treats, it’s crucial to understand the various types you can create for your feline friend. Here are some popular styles you can experiment with:
Crunchy Treats
Firm and crispy, ideal for dental health
Soft Treats
Malleable and easy to chew for all ages
Freeze-Dried Treats
Preserved with nutrients and flavor
Meat Treats
Protein-packed options that cats love
Vegetable Treats
Unique and healthy alternatives
This knowledge will guide you in creating the perfect treats tailored to your cat’s preferences and nutritional needs.
Crunchy Treats
Now that you know about the treat types, crunchy treats are excellent options for keeping your cat’s teeth clean while satisfying their chewing instincts. They can be made with various ingredients including whole grains, chicken, or fish. You’ll find that your cat enjoys the satisfying crunch, and these treats can be a great addition to their daily diet.
Soft Treats
For those cats that prefer a softer option, soft treats are perfect for all ages, especially for kittens and senior cats. Soft treats can be made using ingredients like pumpkin, turkey, or cheese, providing a protein boost while remaining gentle on their teeth.
Soft treats are usually easier to digest, making them an ideal choice if your cat has oral health issues or prefers a tender bite. You can also experiment with different flavors to appeal to your cat’s unique taste preferences, ensuring they get the best out of these wholesome snacks.
On the other hand, freeze-dried treats are a fantastic way to maintain the flavor and nutrients of the original ingredients. They’re lightweight and convenient, perfect for training or rewarding your cat. You might find these options include fish or meats, which are packed with flavor.
A key point to remember is that freeze-drying preserves crucial nutrients while creating an appealing texture for your cat. They can be crumbled over regular meals for added flavor, making them a versatile treat option, though their purchasing price may be a bit higher than traditional homemade alternatives.
Essential Tips for Making Cat Treats
Even the most novice cook can create tasty and healthy cat treats by following these vital tips. Whether you’re a seasoned chef or just starting, make sure to keep these in mind:
Use fresh ingredients for maximum flavor.
Keep portion sizes small to manage your cat’s diet.
Experiment with flavors to find your cat’s favorite.
Store treats properly to maintain freshness.
This will ensure your homemade treats are both enjoyable and beneficial for your feline friend.
Ingredient Selection
For the best homemade cat treats, you’ll want to select ingredients that are not only appealing to your cat but also nutritious. Focus on using high-quality proteins like chicken, fish, or turkey, and incorporate healthy fillers like pumpkin or oats for added benefits.
Safety Considerations
An important aspect of making cat treats is ensuring safety. Always avoid ingredients that are toxic to cats, such as onions, garlic, chocolate, or artificial sweeteners like xylitol. Check labels carefully and opt for human-grade ingredients when possible.
With your cat’s safety as a priority, make it a habit to research each ingredient you plan to use. Certain foods, like onions and garlic, can lead to severe health issues, while others, such as chocolate, are downright dangerous. Additionally, it’s a good practice to consult with your veterinarian before introducing new ingredients, ensuring a positive and safe culinary experience for your furry friend.
Step-by-Step Guide to Popular Recipes
All your feline friends will adore these easy yet tasty homemade cat treats. In this chapter, we’ll break down three popular recipes that your kitty will love, ensuring you have all the information at your fingertips to create delightful snacks. Let’s get started!
Tuna Treats Recipe
Simple, quick, and packed with protein using only a few ingredients!
Chicken Jerky Recipe
Delectable and chewy, perfect for rewarding your cat.
Pumpkin Paws Recipe
Nutritious and tasty, a great source of vitamins for your furry friend.
Tuna Treats Recipe
With just a can of tuna, some flour, and an egg, you can whip up delicious tuna treats that are sure to make your cat purr. Mix the ingredients, roll them into small balls, and bake until golden. Your kitty will love this protein-packed snack!
Chicken Jerky Recipe
The chicken jerky recipe is a wholesome way to treat your cat while ensuring they enjoy something chewy and satisfying. Simply slice chicken breast into thin strips and bake them low and slow for a crispy texture that your feline will crave.
Chicken jerky is an excellent option for those looking to offer their kitties a high-protein, low-carb snack. By using fresh chicken breast, you control the quality and avoid any additives that commercial treats may contain. Just be sure to let the jerky cool properly, and store it in an airtight container to maintain its texture.
Even your cat can enjoy the benefits of pumpkin with these paw-shaped treats! Combining pumpkin puree with whole wheat flour and catnip will create a delightful snack. Roll out the dough and use cookie cutters to shape them into fun paw prints!
Treats made with pumpkin are not only delicious but also helpful for your cat’s digestive health. Packed with fiber and vitamins, these treats can assist in maintaining a healthy coat and aiding digestion. You can feel good knowing you’re providing a nutritious option that’s both enjoyable for your furry friend.
Factors to Consider When Making Treats
Now, when you’re begining on your journey to make homemade cat treats, there are several factors to consider to ensure your feline friend enjoys them safely. Consider the following:
Texture – Cats may have preferences for crunchy or chewy.
Size – Treats should be suitable for your cat’s size.
Dietary Needs – Be mindful of specific dietary restrictions.
After taking these factors into account, you can create delicious and safe treats for your cat.
Cat Allergies
Now, it’s important to be aware of potential cat allergies when making homemade treats. Common allergens among felines include wheat, dairy, and fish. Always consult your veterinarian to identify any specific allergies your cat may have, and choose ingredients accordingly to avoid their discomfort.
Nutritional Value
If you want your homemade cat treats to contribute positively to your cat’s health, you should focus on their nutritional value. Make sure to include high-quality proteins, healthy fats, and vital vitamins in your recipes. Treats shouldn’t replace a balanced diet but can supplement it beneficially.
Understanding the nutritional value of the ingredients you use is vital for your cat’s overall well-being. For example, protein-rich ingredients like chicken or fish are great for muscle development, while healthy fats from sources like salmon oil can support coat health. Incorporating vital vitamins can enhance your cat’s immune system and contribute to their long-term vitality. Avoid excessive fillers like corn or wheat, which offer little nutritional benefit. Balance is key to ensuring your furry companion gets a treat that’s both enjoyable and nutritious.
Pros and Cons of Homemade Cat Treats
Many pet owners contemplate whether to make homemade cat treats, weighing the benefits against potential drawbacks. The following table breaks down the pros and cons to help you make an informed decision:
Pros
Cons
Fresh ingredients
Time-consuming preparation
Customizable recipes
Risk of nutritional imbalance
Control over ingredients
Potentially higher cost
Allergen-friendly options
Storage challenges
Fun bonding activity
Inconsistent results
Advantages
If you choose to make homemade cat treats, you gain control over the ingredients and can tailor recipes to suit your cat’s specific dietary needs or preferences. This can lead to healthier options that avoid common allergens found in commercial treats, ultimately benefiting your feline friend.
Disadvantages
One downside of homemade cat treats is the preparation time involved. Unlike store-bought treats which are ready to serve, you must invest time in researching recipes, shopping for ingredients, and actually making the treats.
Cons of homemade cat treats can include the potential for nutritional imbalance if you don’t provide a well-rounded formula. Additionally, your production process may lead to inconsistent quality in taste and texture, which might not appeal to your cat. Moreover, without proper storage, you may face spoiling risks, making it imperative to create small batches that you can use quickly. Lastly, the initial cost of ingredients can add up if you’re using premium options, making it less economical in some cases.
Despite your efforts to create delicious homemade cat treats, proper storage is important to maintain their freshness and ensure your cat’s health. Treats can typically last from one week to several months, depending on the ingredients used and how they are stored. To keep your treats safe and tasty, be mindful of their shelf life and storage methods!
Best Practices for Storage
You should always store your homemade cat treats in an airtight container to keep them fresh for longer. Depending on the recipe, refrigeration may be necessary to prevent spoilage, especially if your treats contain perishable ingredients. For long-term storage, consider freezing them, as this can extend their shelf life significantly without compromising quality.
Recognizing Spoiled Treats
Spoiled treats can pose a risk to your cat’s health, so it’s vital to inspect them before offering them. Look for signs such as an unusual odor, changes in color, or any mold formation. If any of these indicators are present, discard the treats immediately to prevent potential harm to your furry friend.
Plus, you should always trust your senses when determining the freshness of your treats. If you notice a foul smell or see mold or discoloration, these are signs that the treats are no longer safe for consumption. Additionally, check for any unusual texture that may indicate spoilage. Ensuring that your cat only gets fresh treats is important for their overall health and well-being.
Summing up
Conclusively, by following the comprehensive advice in ‘The Ultimate Guide To Homemade Cat Treats – Tips, Tricks, And Recipes’, you are empowered to create nutritious and delicious treats for your feline friend. Utilizing the tips and recipes provided, you can enhance your cat’s diet while also enjoying the bonding experience of homemade cooking. Your efforts not only contribute to your cat’s well-being but also allow you to express your love and care in a delightful way. Happy treating!
FAQ
Q: What are some vital ingredients for making homemade cat treats?
A: When creating homemade cat treats, consider using ingredients that are safe and nutritious for your feline friend. Some vital ingredients include: – Chicken or Fish: As a primary protein source, cooked chicken or fish are popular choices for flavor and nutrition. – Pumpkin: Rich in fiber, canned pumpkin is beneficial for your cat’s digestive health and adds moisture to treats. – Oat Flour: A gluten-free option, oat flour can serve as a base for treats and is easy for cats to digest. – Eggs: Great for binding, eggs also provide protein and vital fatty acids. – Catnip or Cat Grass: These ingredients can add flavor and make the treats more enticing for your cat. Experiment with these ingredients while ensuring they remain safe for feline consumption.
Q: Can I use my regular kitchen equipment to make cat treats?
A: Yes, you can definitely use your regular kitchen equipment to make homemade cat treats. Basic tools such as mixing bowls, measuring cups, baking sheets, and cookie cutters are all you need to get started. Make sure to use utensils and equipment that haven’t been used for any toxic ingredients to cats. A food processor or blender can help mix ingredients thoroughly, especially if you’re incorporating meats or fibrous vegetables. Cleaning your kitchen equipment thoroughly before use will ensure it’s safe for your pet’s treats.
Q: How do I store homemade cat treats to keep them fresh?
A: Proper storage helps maintain the freshness and quality of your homemade cat treats. Here are some tips for effective storage: – Airtight Container: Store treats in an airtight container to prevent exposure to air, which can lead to staleness. – Refrigeration: For treats containing perishable ingredients, such as cooked chicken or fish, store them in the refrigerator to prolong freshness. – Freezing: If you’ve made a large batch, consider freezing some for later use. Just ensure they are in a freezer-safe container or tightly wrapped to avoid freezer burn. – Labeling: Always label your containers with the date they were made, so you can keep track of freshness and avoid feeding your cat expired treats.


")
")